[speech_bubble type="std" subtype="L1" icon="itokuma-normal.png" name="しげちゃん先生"]前回から、ラズベリーパイ4を動かすための準備をしています。
今回は、起動ディスクを作成します。
[/speech_bubble]
[speech_bubble type="std" subtype="R1" icon="sanoyu-normal.png" name="新人Y子"]OSの名前は、「ラズビアン」でしたよね。
[/speech_bubble]
[speech_bubble type="std" subtype="L1" icon="itokuma-normal.png" name="しげちゃん先生"]はい、今回は、その「ラズビアン」OSの起動ディスクを作成します。
[/speech_bubble]
[speech_bubble type="std" subtype="L1" icon="itokuma-normal.png" name="しげちゃん先生"]まず、ここから、「Raspberry Pi Imager」というソフトをダウンロードしてください。
[/speech_bubble]
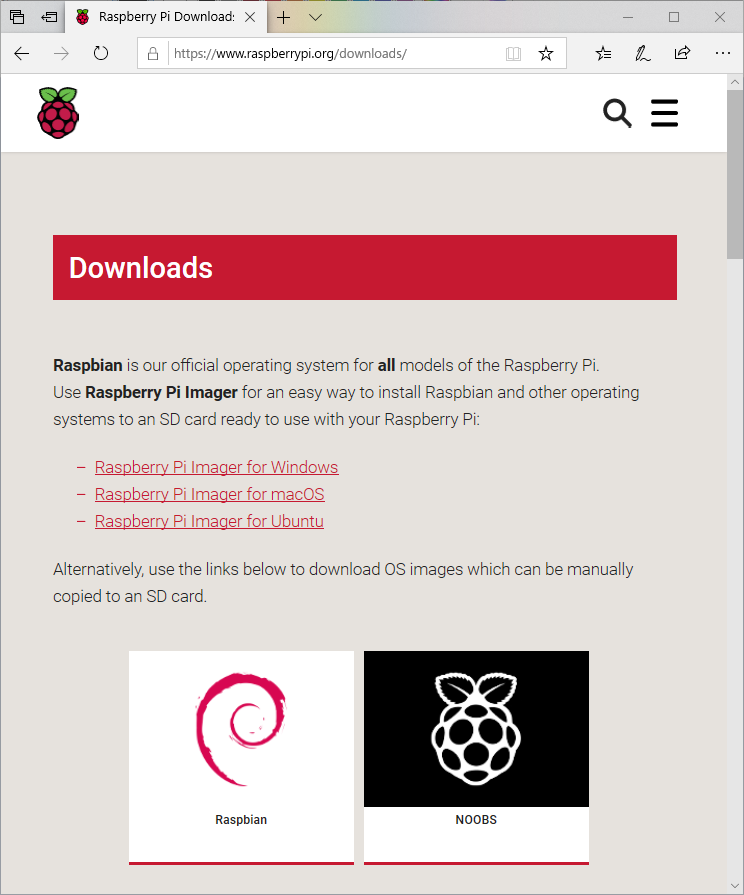
[speech_bubble type="std" subtype="R1" icon="sanoyu-normal.png" name="新人Y子"]Windowsの方は「for Windows」。MACの方は「for MacOS」をダウンロードすればいいですね。
[/speech_bubble]
[speech_bubble type="std" subtype="L1" icon="itokuma-normal.png" name="しげちゃん先生"]はい。使用中のPCのOSに対応した「Raspberry Pi Imager」のダウンロードを行ってください。[/speech_bubble]
[speech_bubble type="std" subtype="L1" icon="itokuma-normal.png" name="しげちゃん先生"]ダウンロードが終わったら「Raspberry Pi Imager」をPCにインストールします。
[/speech_bubble]
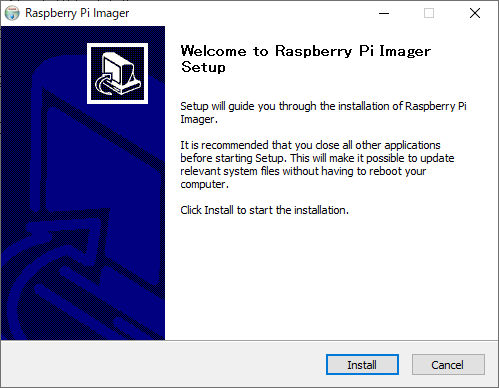
[speech_bubble type="std" subtype="L1" icon="itokuma-normal.png" name="しげちゃん先生"]「Raspberry Pi Imager」のインストールが終わったら、「Raspberry Pi Imager」を起動してください。
[/speech_bubble]
[speech_bubble type="std" subtype="R1" icon="sanoyu-normal.png" name="新人Y子"]「Raspberry Pi Imager」を起動しました。
[/speech_bubble]
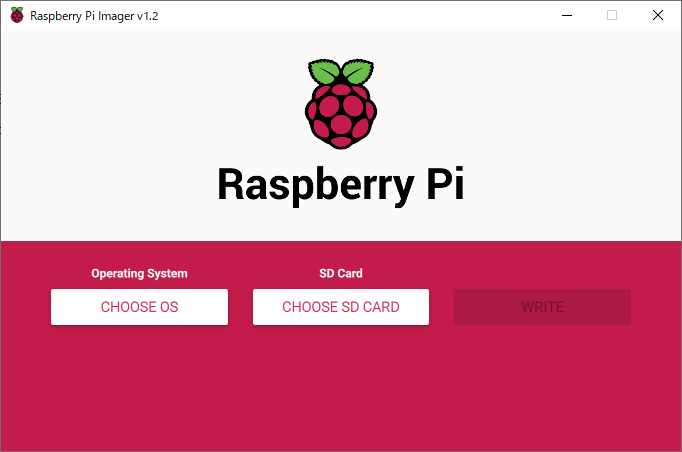
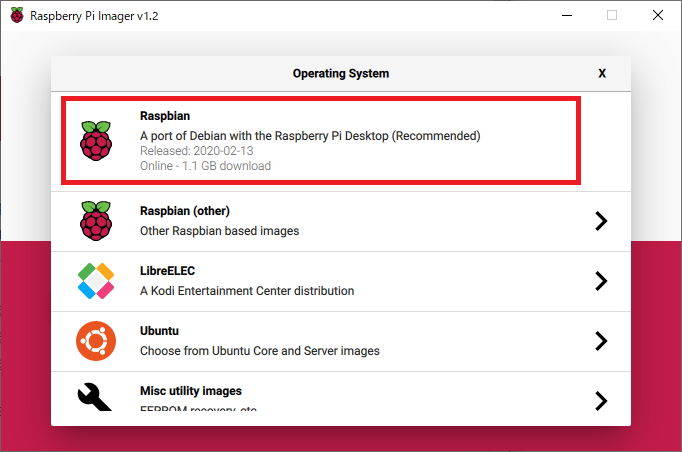
[speech_bubble type="std" subtype="L1" icon="itokuma-normal.png" name="しげちゃん先生"]「CHOOSE OS」では、今回は「Raspbian」を選択してOKを押してください。
[/speech_bubble]
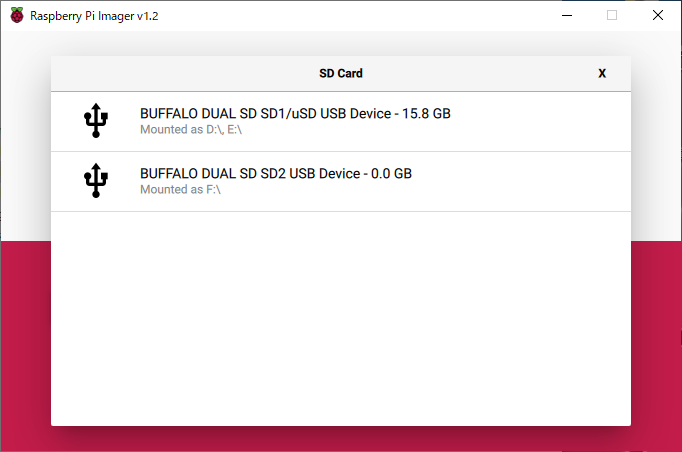
[speech_bubble type="std" subtype="L1" icon="itokuma-normal.png" name="しげちゃん先生"]次に、SDカードをPCにセットしてから「CHOOSE SD CARS」を押して、SDカードを選んでください。
[/speech_bubble]
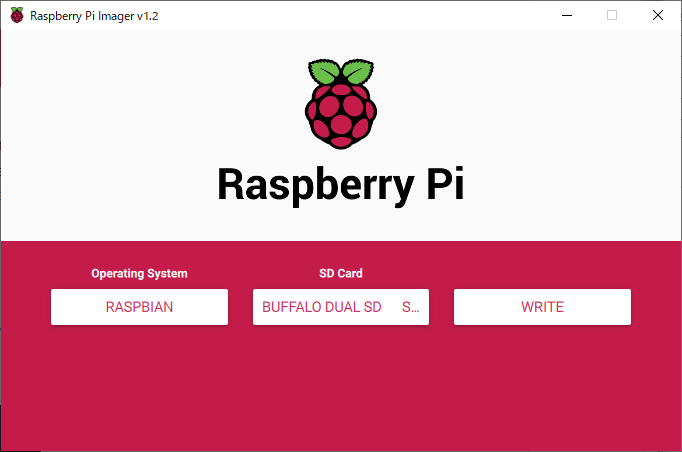
[speech_bubble type="std" subtype="L1" icon="itokuma-normal.png" name="しげちゃん先生"]「WRITE」を押すと、SDカードにラズビアンの書き込みが開始されます。
[/speech_bubble]
[speech_bubble type="std" subtype="R1" icon="sanoyu-hatena.png" name="新人Y子"]あれ、何かエラーが出ました。
[/speech_bubble]

[speech_bubble type="std" subtype="L1" icon="itokuma-normal.png" name="しげちゃん先生"]Windows10でこのエラーが出た場合、「Raspberry Pi Imager」を「管理者として実行」すると書き込める場合があります。
[/speech_bubble]
[speech_bubble type="std" subtype="R1" icon="sanoyu-normal.png" name="新人Y子"]「Raspberry Pi Imager」を閉じて「管理者として実行」しなおしたら、WRITEうまくいきました!
[/speech_bubble]
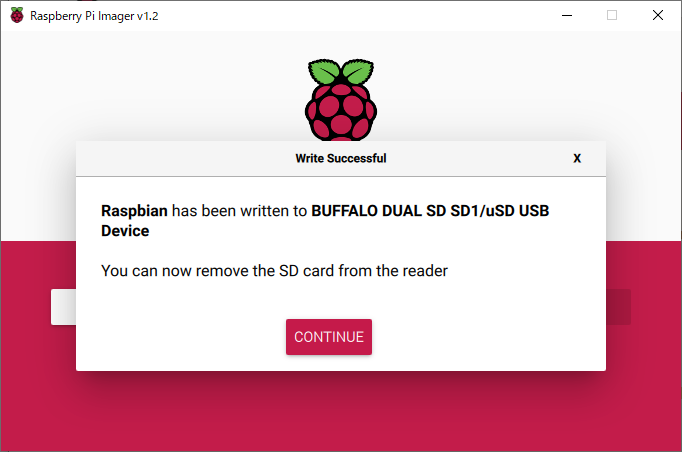
[speech_bubble type="std" subtype="L1" icon="itokuma-normal.png" name="しげちゃん先生"]このSDカードがRaspberryPI4の起動ディスクです。
SDカードをRaspberry PI 4のSDカードスロットに入れ替えてください。
[/speech_bubble]
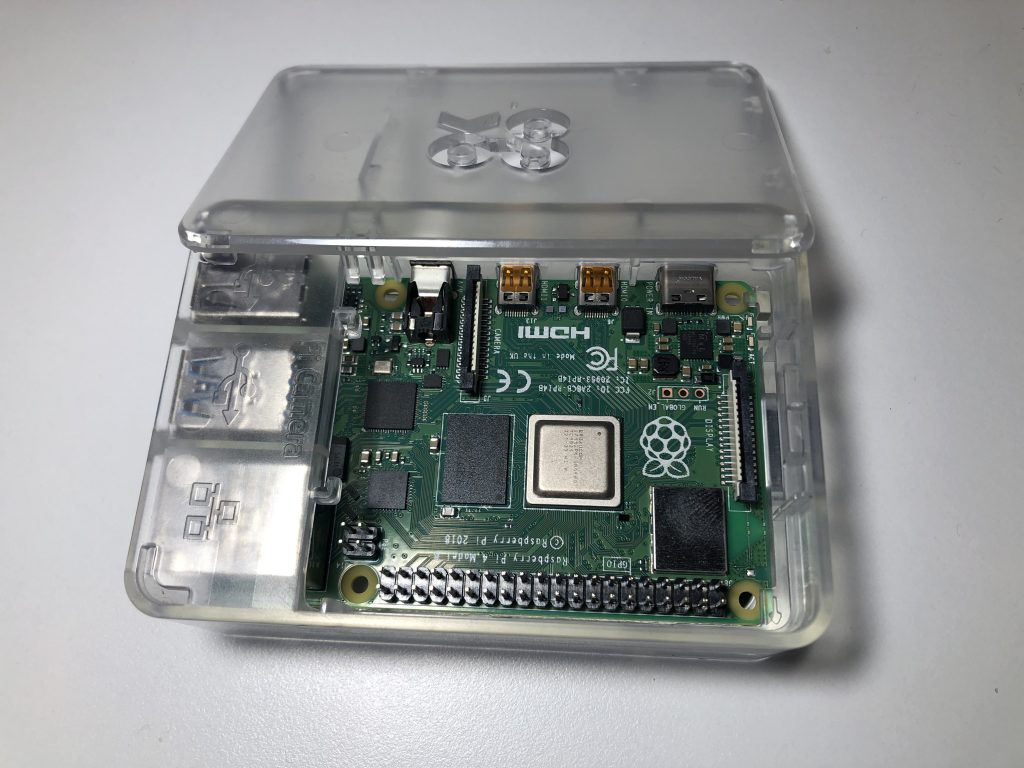
[speech_bubble type="std" subtype="R1" icon="techtrageman-normal.png" name="テクトレージマン"]さあ、ラズビアンを起動しましょう。
次回に続く[/speech_bubble]